Conway invented his famous game of life in 1970.
There are many many web pages and articles devoted to this incredible game,
e.g.,
ConwayLife.com and
Wikipedia page.
There is a vast and thriving community around investigating
constructions and phenomena associated with this game.
I decided to hang some shader art work on a variation of
the game of life here.
On this page I describe what I did.
This is an elementary low tech description.
A few example screenshots are shown.
Rules of Conway's life
For completeness, here are the rules of the original game:
A cell is a square on a regular grid of squares.
A cell can be alive or dead
A common practice is to colour live squares black and dead squares white,
but any notation can be used
A cell has 8 neighbours, which are the cells adjacent, including
diagonally adjacent.
Play:
At generation 0 we have an initial configuration of life or dead squares
At generation n for n > 0, for each cell C, count the number of neighbours
of C which are alive or dead.
If C is alive in generation n, and has 2 or 3 live neighbours, then
C is also alive in generation n+1. Otherwise C is dead
If C is dead in generation n, and has 3 live neighbours, then
C is alive in generation n+1. Otherwise C is dead
Keep playing by iterating the above rules
Variations
All kinds of variations on the above rules have been studied.
This is an area of mathematics/computer science called cellular automata and also
part of dynamical systems. You can change the grid, or the number of neighbours,
or the rules for generation and so on. E.g.,
Packard and Wolfram Look at all the different cases where
1-4 are the same (in the list of rules of Conway's game above),
but different rules replace (c) and (d).
On the other hand,
slackermanz looks at different shaped neighbourhoods.
Even if you stick to the rules of Conway's life, there is a great deal to explore, for example building simulated computers with Conway's life; it's pretty amazing.
I am mostly looking at a generative art motivated exploration, so it's mostly
(3) in the above list that I want to diverge from.
However, to get better pictures I also changed (2) and modified (c) and (d).
Although my rules were motivated by how the results look, I think they are
also interesting computationally and mathematically.
My variation
I use the following rules:
A cell is a square on a regular grid of squares.
A cell can have a life value ℓ between 0 and 1.
I interpret
0 as completely dead, 1 as fully alive.
This is sort of more like computer
games where you have a life value that goes up or down, and you have to get
food or repair injury or whatever, rather than instantly be alive or dead.
So, the birth and death
rules are replaced more by rules of whether the neighbours
are sufficiently supportive to increase your quality of life, or whether they
are draining on your life force.
The value of life, and possibly life in neighbouring cells,
determines the pattern (art work) in a given cell.
A cell has 8 neighbours, which are the cells adjacent, including
diagonally adjacent.
I have a value L which is my life theshold. This may remain constant
throughout the game, or may change over time, or depending on the
position on the grid. For the moment, we fix L for the duration of a
game, and over the whole board.
I will call a cell with life value ℓ alive if ℓ≥ L and dead otherwise.
(I could also asign the cells a "do I like this" value, and the cells which
have non zero life value less than but close to L would have a negative
"do I like this" value, because they are not completely dead;
however, I try to choose not to anthropomorphise my cells.)
I have a value δ, a small positive number less than 1, which is my "life increment".
This means life
increases or decreases by steps of size δ. This means that life is still
played in a discrete manner, with possible life values positive multiples of δ
between 0 and 1.
As long as life generations are incremented in discrete time intervals,
it will be impossible to get a truly continuous change in life value.
It may be that it is possible to come up with a continuous formular
based on a continuous time change. Also one could change the increment
depending on for example, whether you are increasing or decreasing, or you
could have different increment rules than the ones I give below.
Play:
At generation 0 we have an initial assignment of a value
x in [0,1] to each cell in our grid.
At generation n for n > 0, for each cell C, count the number of neighbours
of C which are alive or dead. Let ℓ be the life value of C.
If x is alive, i.e., ≥ L in generation n, and has 2 or 3 live neighbours, then
C's life value becomes x+δ in generation n+1, up to max value 1.
Otherwise C's life value becomes x-δ, in generation n+1, down to min value 0.
If C is dead in generation n, and has 3 live neighbours, then
C's life value becomes x+δ in generation n+1, up to max value 1.
Otherwise C's life value becomes x-δ, in generation n+1, down to min value 0.
Keep playing by iterating the above rules
Play version 2: If the computations are made sequentially, rather than in
parallel, it is computationally easier to change the life value of
a cell as the cell is considered, rather than waiting until all cells have
been considered at each generation. However, this may lead to quite different
results, and will in general depend on the order in which the cells life values
are computed. In a still life situation however, where there is no difference
in sucessive generations, there will be no difference in whether the
cells life values are changed one at a time, or only all at once.
Also, I believe that if one is aiming to find stable still life configurations,
it is advantagous to adjust life values one at a time rather than
simultaneously.
Art based on Conway's game of life
Description of my pictures
Please read above sections for notation and references.
In the generative art works here I play version 2 by default.
You can choose to play by the first version, which is slower.
Also, even with L parameter value 1, we don't approach the usual life,
because the increment value is small.
In another program, here,
I have a version that does approach
usual Conway's life.
Now we have a (more or less) continuous parameter between 0 and 1, instead
of just marking a cell alive or dead, we can have some marking that varies depending
on the parameter. I say more or less continous, because as mentioned, the life
increment is discrete, but since it's quite small, the changes look continuous.
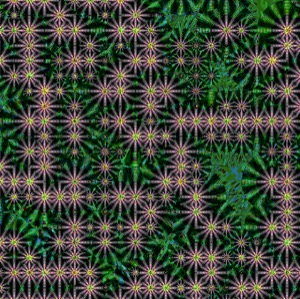
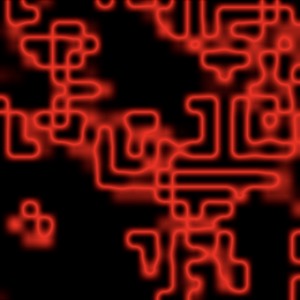
In my page here here, I have the styles below.
I have based many of these on the method of producing
Perlin noise from discretely distributed random values.
Rendering. Notes on Shaders/colouring algorithm
[[a,b],[c,d]]
0.25
0.75
1.00
0.00
The pictures here are produced by a WebGl shader and JavaScript.
(The above is just svg in this explanation, just for less code, since it's a very simple case.)
I learnt a lot about how to do shaders from
The
book of shaders, and
WebGl fundementals.
For a shader, you need a vertex shader, which tells you where the corners
of your object are, and a fragment shader, which tells you how to colour it.
My vertex shaders are just little squares in an array. I have currently put
20 columns across the screen, and however many rows to fill the screen.
Lets write C for the number of columns, and R for the number
of rows.
In general vertices in a vertex shader
could describe pretty much any 3D shape, and it could be
moving around, changing shape, etc, so my vertices are very simple,
and my little squares just
sit on the screen doing nothing, only the image on them, the fragment shader,
changes.
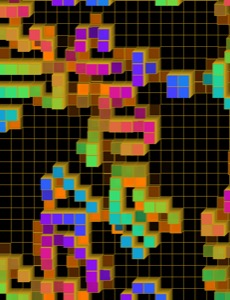
The canvas area is divided into a CxR array of squares (or call them
cells or tiles). The JavaScript passes parameters to the WebGl
fragment shader which describes how the tile should be coloured.
In JavaScript, I have a CxR array A (nested array)
of life values, whos values
are continually updated by the JavaScript, according to the rules of the
game described above.
The most natural assignment of parameter to the tiles on the canvas
is to take the value of A[i][j] as my parameter to determine the drawing
on the tile at position (i,j). Here i and j are non negative integers.
Here is a simple example.
On the left is an array, A=[[a,b],[c,d]], as it might be
entered into JavaScript.
In the middle is a more human readable arrangement of the values.
On the right is a corresponding array of tiles. The parameter is used
to determine the radius of the circle on the tile.
The parameter could be used to control all kinds of aspects of whatever
is drawn in the corresponding cell. This method is used in the first few
examples here, where it controls the size of the circle,
the shading, or angle of rotation of the tile.
Try different options here, applied to the above example.
You could apply any kind of combination of these, e.g., the parameter could
change all the above attributes at the same time. This is an example
of how one uniform parameter in the JavaScript is input into the fragment
shader. If several uniforms were used, the parameters could be controlled
separately.
a=A[0][0]b=A[0][1] c=A[1][0]d=A[1][1]
Overlapping tiles
In the above example, the values in the array of life array each
control a separate tile. But this means there can't be any overlapping
of the images, because different tiles are not passed any information about
what is in neighbouring tiles. (I mean in a WebGl situation where they are not passed more info. The above
picture is svg, for less code)
To overlap tiles, we will have to pass more information.
E.g., instead of passing just the value of A[0][0] to tile at
position (0,0), we could pass the values in A[0][0], A[0][1],
A[1][0], A[1][1] to the tile at the (0,0) position. The most basic case would be just to have
the values used to control four different things, e.g., have four quarter circles, one of each of these
radii, at each of the four corners.
In the following picure, the info from 9 cells in the JavaScript array is
passed to 4 tiles. Each tile gets the data from 4 cells. In order to show that the cells are
distinct, I move them slightly apart, but in the program
I am describing here, the squares match up exactly.
Also in the example here, four pieces of data are passed to each tile.
The top left gets the data a=A[0][0], b=A[0][1], c=A[1][0], d=A[1][1];
the top right gets a=A[0][1], b=A[0][2], c=A[1][1], d=A[1][2];
The bottom left gets a=A[1][0], b=A[1][1], c=A[2][0], d=A[2][1];
the bottom right gets a=A[1][1], b=A[1][2], c=A[2][1], d=A[2][2].
In some of the
examples in the shader I'm describing,
I pass information from the nearest corresponding 16 cells in a 4x4 region.
A[0][0]A[0][1]A[0][2] A[1][0]A[1][1]A[1][2] A[2][0]A[2][1]A[2][2]
[[a,b,c],[d,e,f],[g,h,i]]
a
d
g
b
e
h
c
f
i
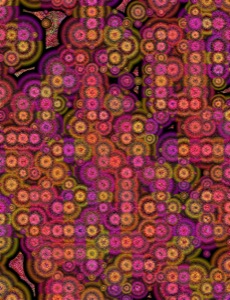
Description: Each tile gets parameters a,b,c,d from the array A, as described above.
For circles, these determine the radius of circles centered at each
of the four corners of the tile.
The circles can be coloured so that the colours match, but to emphasise that
the same code is used with different variables in the different tiles,
I have used the same colouring per tile. i.e, red top left, blue top right,
green bottom left, yellow bottom right.
For Voronoi the colour of a point in a tile is determined by the
vertex it is closest to - except the distance is weighted, so instead of comparing
the distance from the point to each of the four corners of the tile, we multiply the distance by
the value assigned to the corner by a, b, c, or d, depending on the corner.
For rgba a,b,c,d determine respectively the red, green, blue and opacity values of the
colour of the tile.
For mix the shade is given by a number determined by a mix of the colours assigned to each
corner of the tile. The closer to a corner, the closer the shade is to the value assigned to that corner.
There are many different ways to mix values in a continuous way, I choose a very simple option,
taken from the book of shaders.
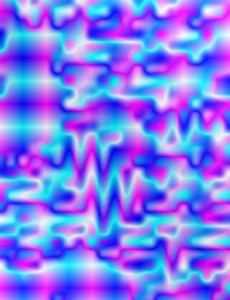
For folds I use the same mixing formula to give a value for a
point on the tile, then I apply shading that instead of
going from black to white as the parameter goes from 0 to 1, alternates from black to white more frequently.
The button option uses the parameters to draw a picture of parts of four buttons,
with the different values of the
parameter determining the values of the buttons's height.